Steps to create a Funnel Chart in Tableau
What is a funnel chart?
A funnel chart is used to illustrate diverse levels of a process in the nature of funnels, portraying a top-bottom approach. Standard parameters like costs, profit, and sales etc, determine the size of funnels. Two of the most important uses of funnel charts include.
Funnel charts help individuals to locate and identify problem areas within a process.
Funnel charts are particularly useful in identifying the most sizeable sales mix.
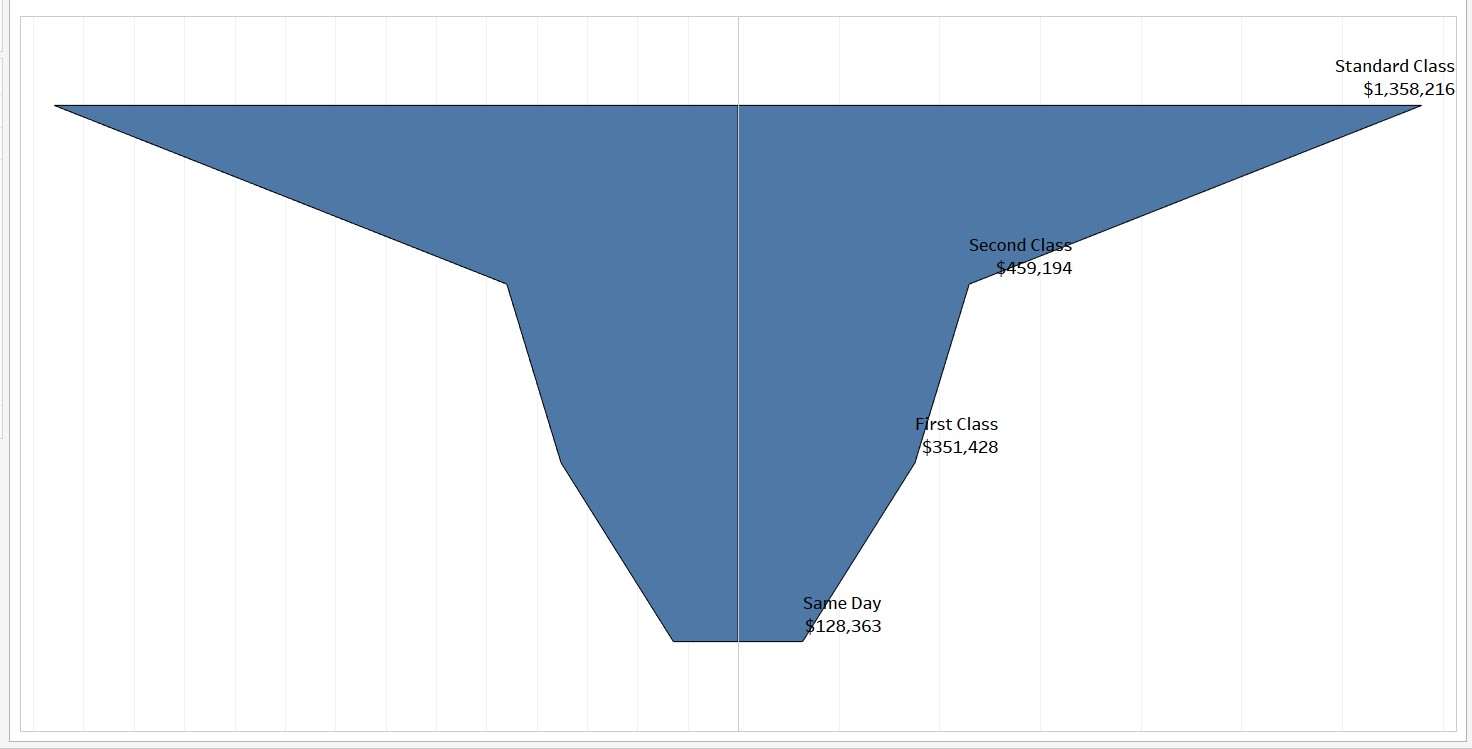
The funnel chart shown below is what we aim to achieve in this article.
Outline
In this article, we teach users how to design a funnel chart in tableau. We are going to use Sample-Superstore data in this scenario.
Aim
Our objective is to determine the most optimum “Ship Mode”, which results in maximum sales for the business enterprise. We have to use a funnel chart in order to easily pinpoint various contribution levels. The Y-axis of the chart should represent “Ship Mode” and the X-axis should represent sales volume.
The next few steps will help you to cluster in Tableau.
- We have to connect to the Sample-Superstore dataset – We have to open Tableau Desktop. The next step is to choose the “Sample-Superstore” dataset option.
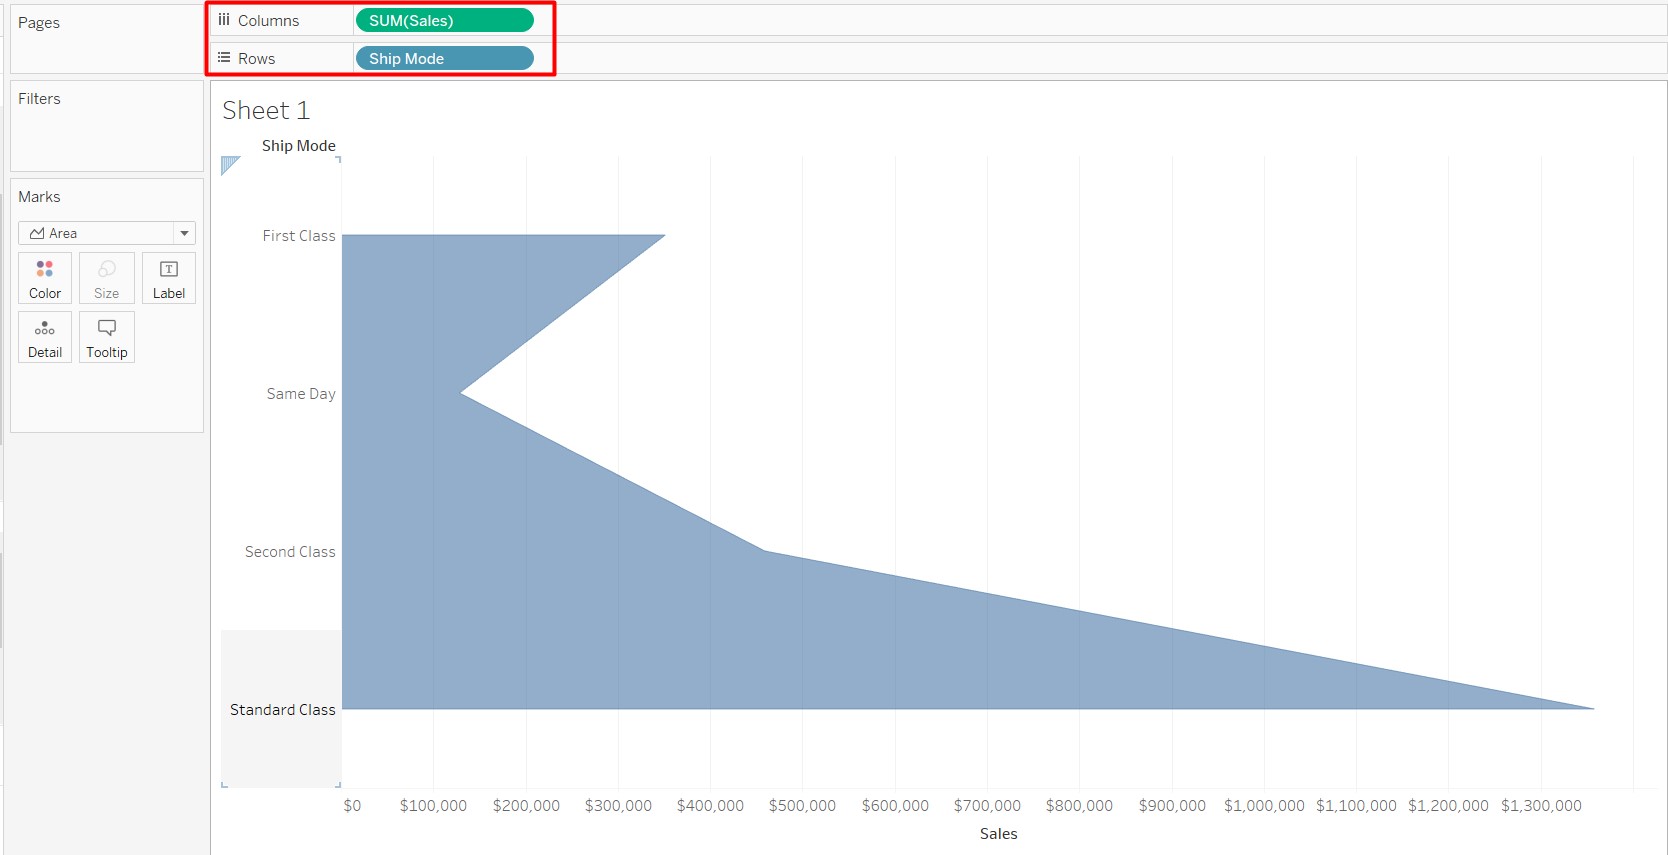
- The next step is to proceed to Sheet 1.
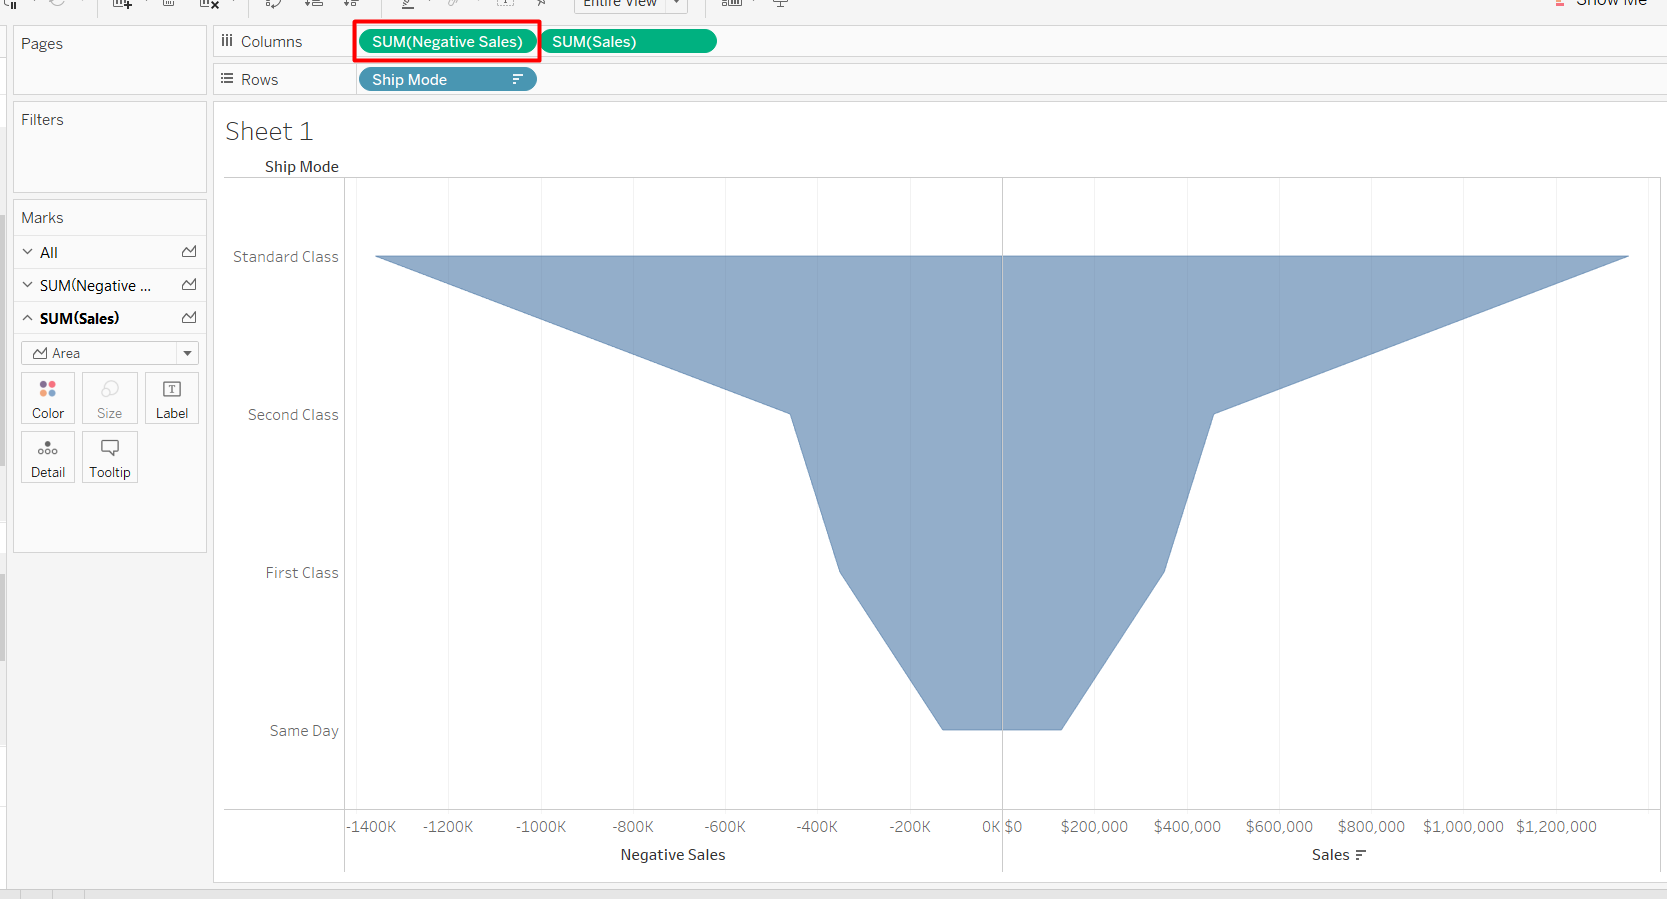
- The next step is to drag the “Ship Mode” dimension to “Rows” shelf and “Sales” measure to “Columns” shelf.
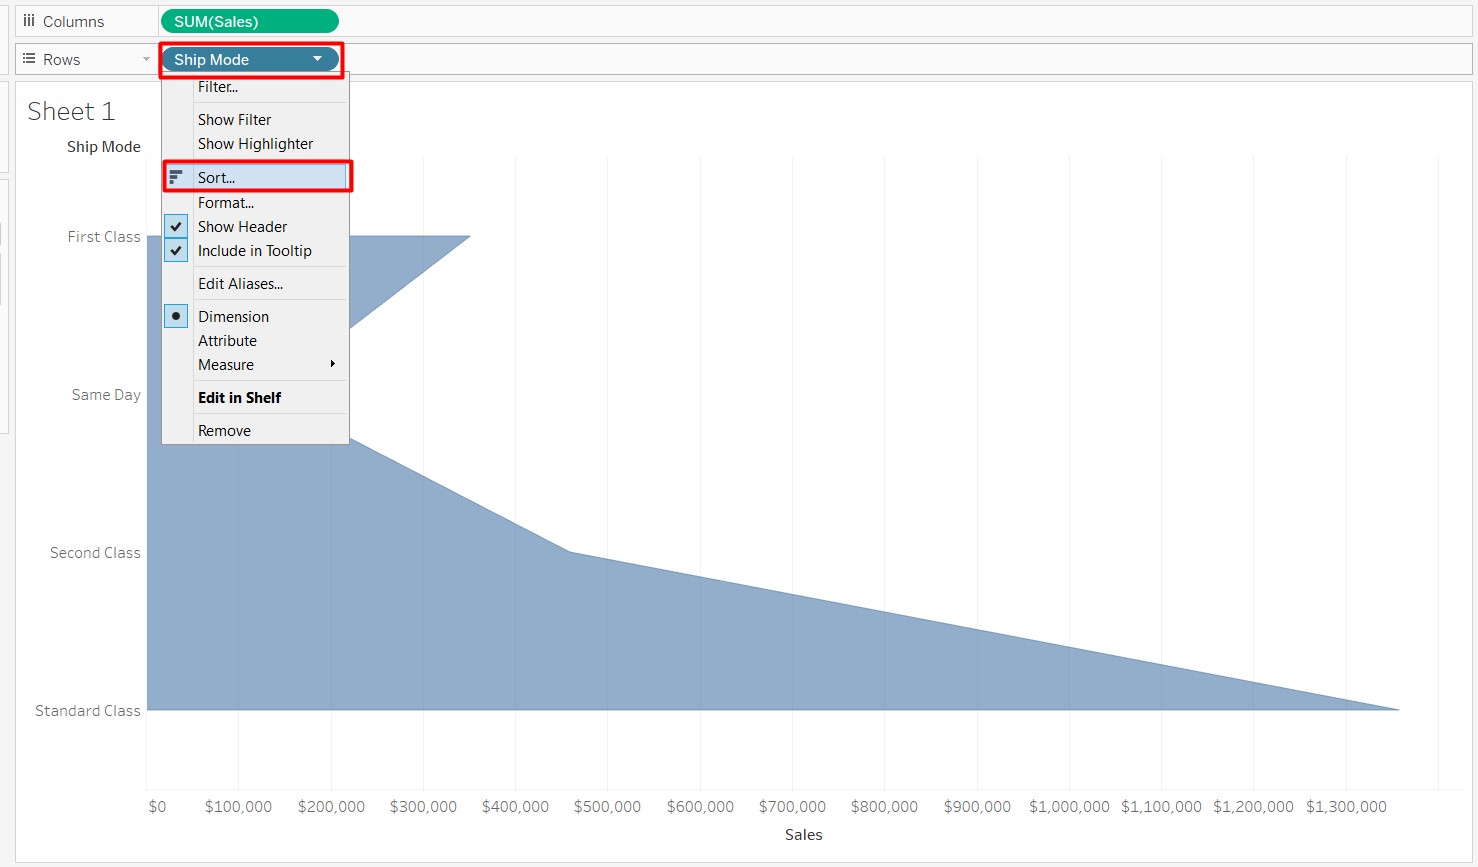
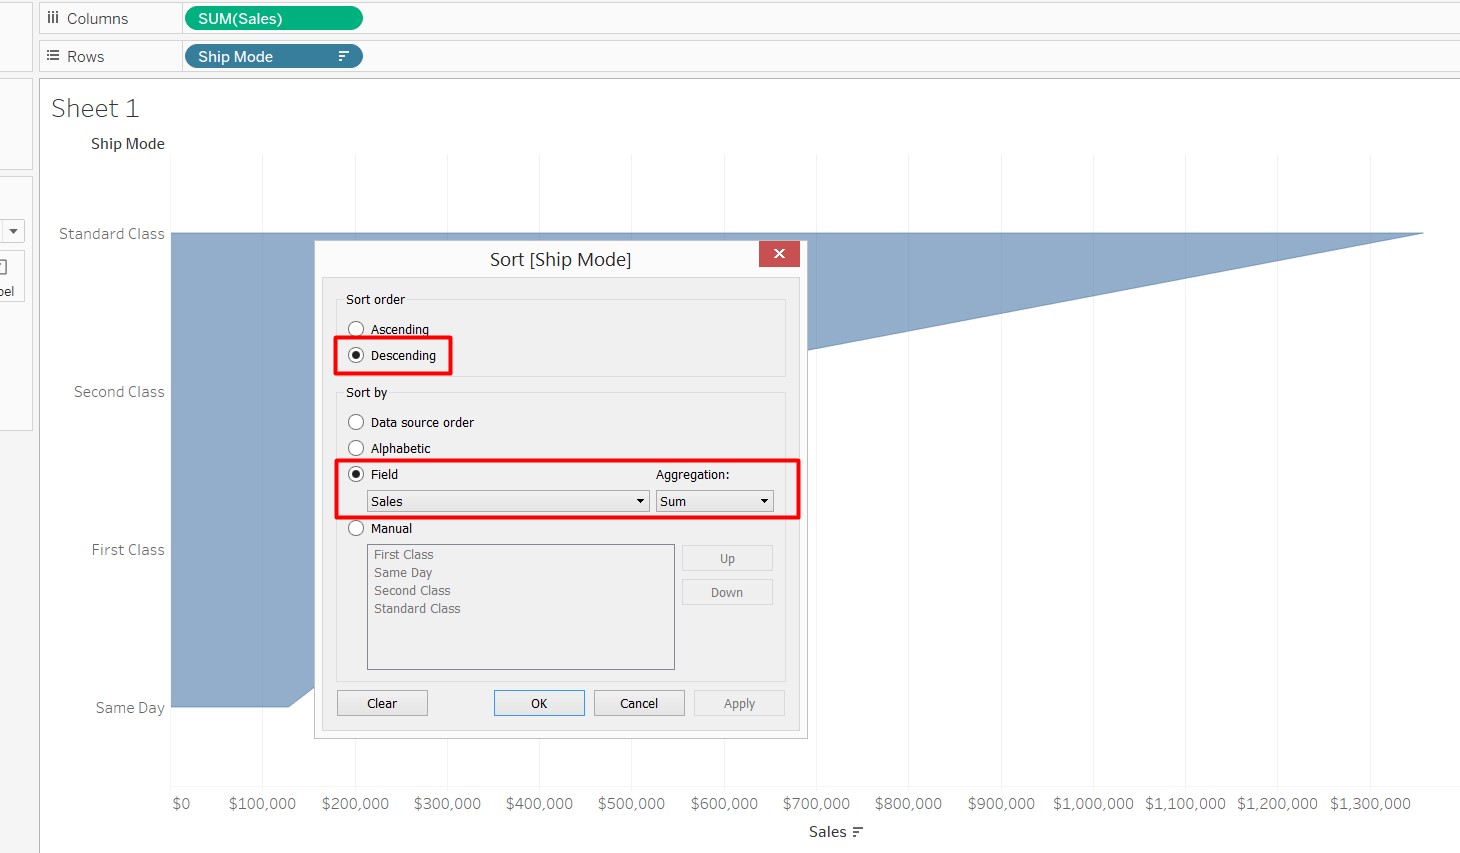
- We have to choose that “Ship Mode” from Rows and categorize the data on the basis of Sales in descending order.
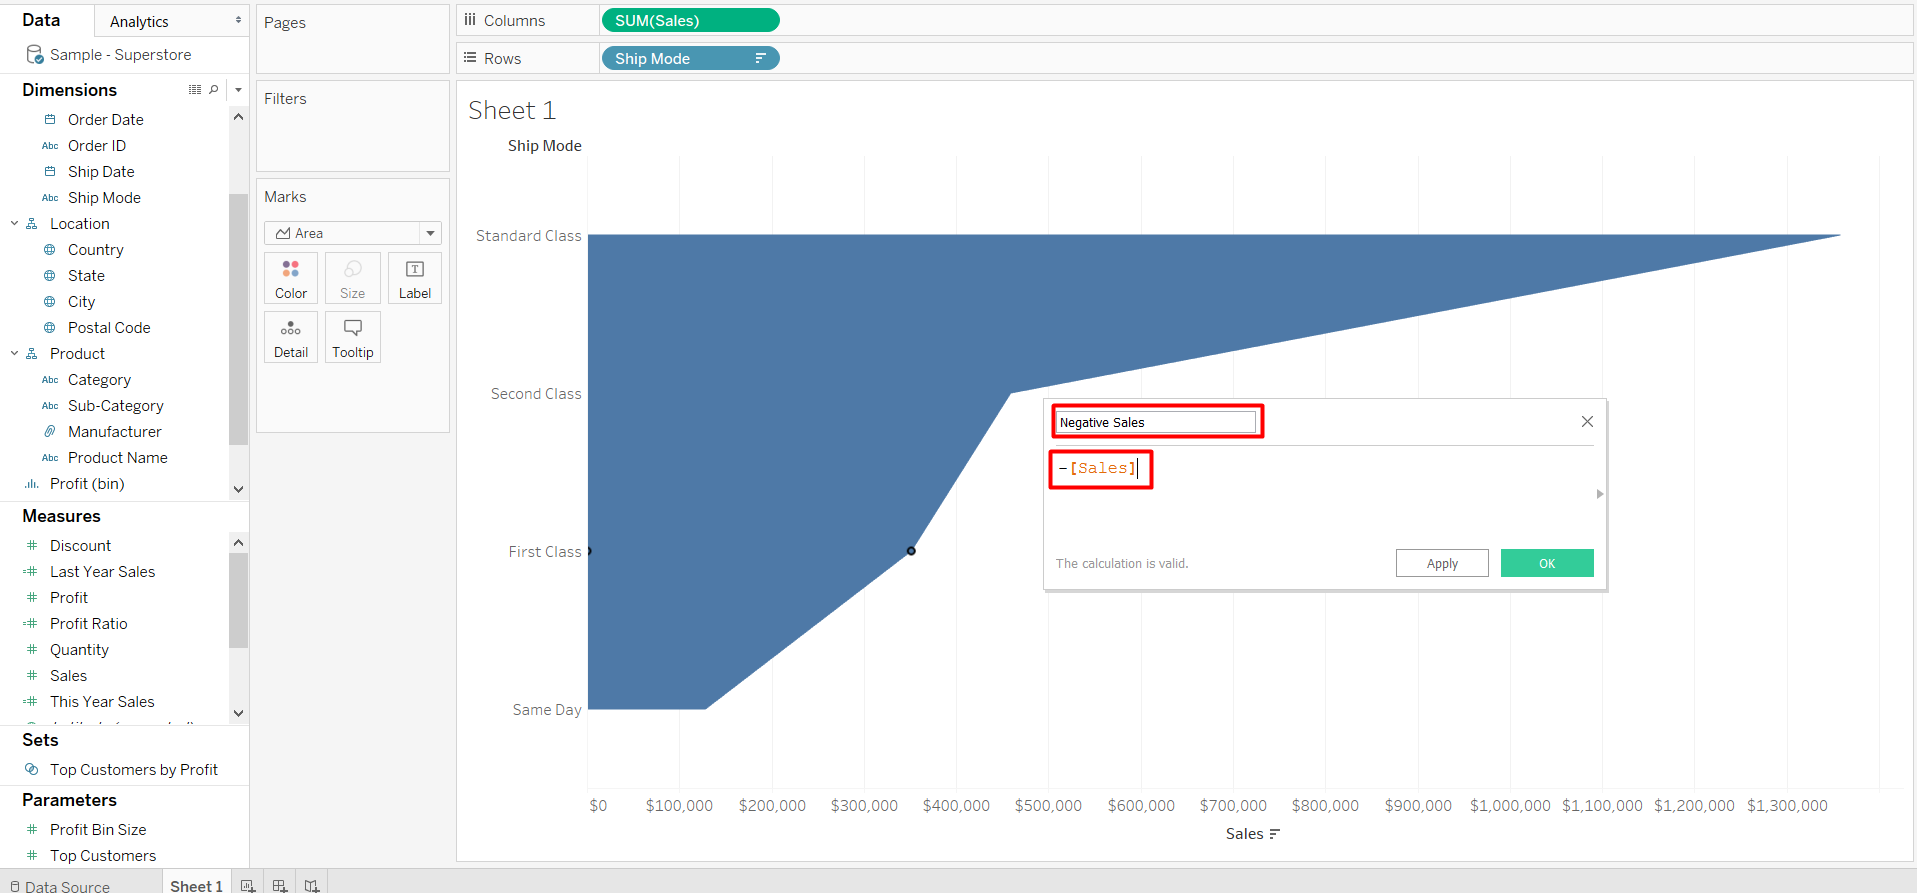
- The next step is to design a new field (or column) titled “Negative Sales”. This is an example of a calculated field. In a calculated field, the values are obtained by predetermined calculations, which the user controls. The “Negative Sales” field will measure negative sales in the dataset.
- Now we have to drag and drop the “Negative Sales” field to the left of the “Sales” measure in the Columns.
- The next step is to use the ‘Colors’ marks card to add borders to the funnel chart.
- We have to add the labels of sales value and ship mode to the chart. This will give us a better perspective.
- Next, we have to hide the x-axis and y-axis headers.
- Once you have completed formatting and following the steps mentioned above, your very own funnel chart will resemble the picture below.
Outcome
Once we have analyzed the funnel chart for “Ship Mode”, we can simply conclude that the “Standard Class” ship mode results in the largest volume of sales.